In today’s fast-moving digital world, organisations across the UK are embracing digital signage to engage customers, improve internal communications, and deliver information in a dynamic way. But before the eye-catching visuals and live updates can do their job, there’s a crucial first step: digital signage setup.
From the initial site survey to installing screens and configuring software, a proper setup ensures your investment delivers maximum impact. In this guide, we’ll walk you through the physical installation process, highlight why professional planning matters, and show you how Sabercom provides a complete end-to-end solution.
Why Digital Signage Setup Matters
The success of a digital signage project doesn’t just depend on great content or sleek hardware. The way your screens are installed and configured plays a huge role in reliability, visibility, and long-term performance. Poor setup can lead to:
- Screens positioned where they aren’t noticed.
- Health and safety risks from poor cabling or mounts.
- Reduced screen lifespan due to overheating or direct sunlight.
- Unreliable connections leading to downtime.
A professional digital signage setup eliminates these risks, ensuring your network of screens runs smoothly from day one.
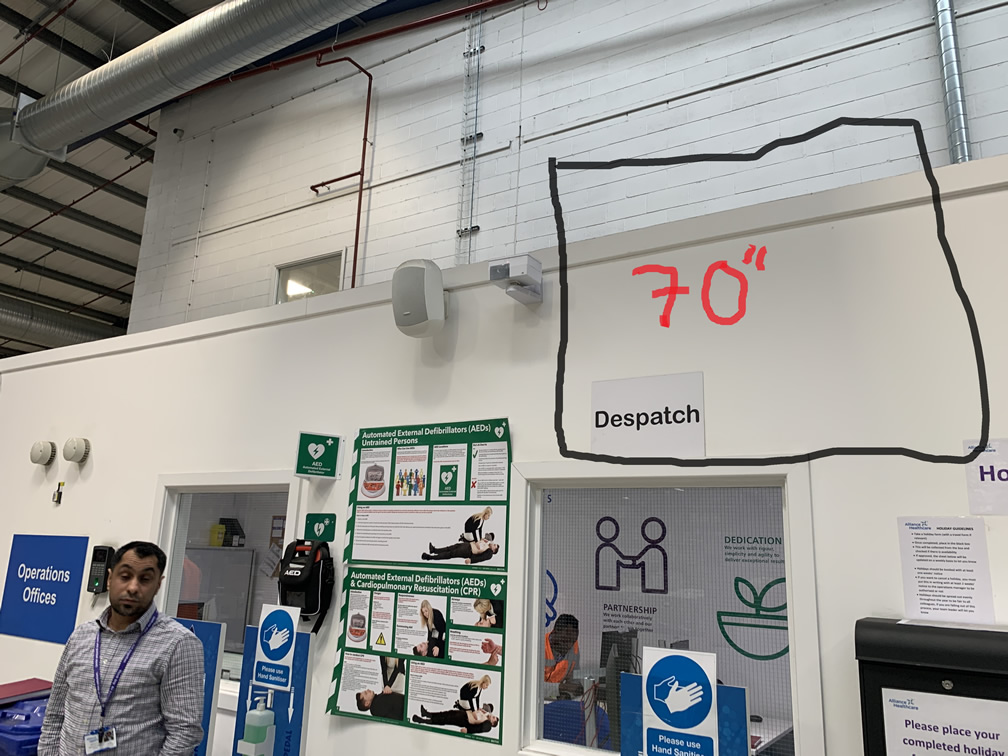
Step 1: Site Survey – The Foundation of a Successful Digital Signage Setup
A site survey is the first step in any digital signage installation. This stage allows installers to understand the physical environment, identify challenges, and plan for the best possible positioning of screens.
During a site survey, professionals will assess:
- Viewing angles: Screens should be placed where they’re easily visible without straining the neck or eyes.
- Lighting conditions: Direct sunlight or strong artificial light can cause glare, making screens hard to read. Anti-glare coatings and screen brightness adjustments are considered.
- Mounting surfaces: Walls, ceilings, and stands must be structurally capable of supporting the chosen display.
- Power and network access: Reliable power sources and internet connectivity (wired or wireless) are essential.
- Footfall and audience behaviour: Understanding how people move through a space helps position screens for maximum engagement.
By carrying out a detailed survey, you avoid costly mistakes later in the process and guarantee that your signage performs to its full potential.
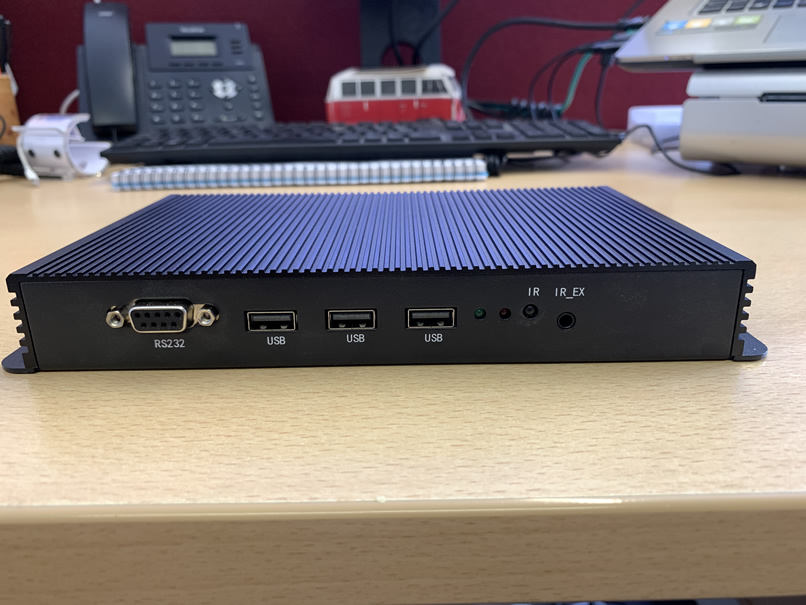
Step 2: Choosing the Right Hardware
Once the site survey is complete, the next stage of digital signage setup is selecting suitable hardware. This includes:
- Screens: Commercial-grade displays designed for continuous operation. These differ from consumer TVs, offering higher brightness, durability, and longer warranties.
- Mounts and brackets: Wall mounts, ceiling suspensions, or freestanding kiosks, all tailored to the environment.
- Media players: Dedicated devices that store and deliver your content smoothly.
- Cabling and connectivity: HDMI, DisplayPort, or network cabling to ensure secure and reliable communication between devices.
Selecting the right hardware ensures not only visual impact but also longevity and reduced maintenance costs. More information about hardware can be found in our Digital Signage Solutions Guide.
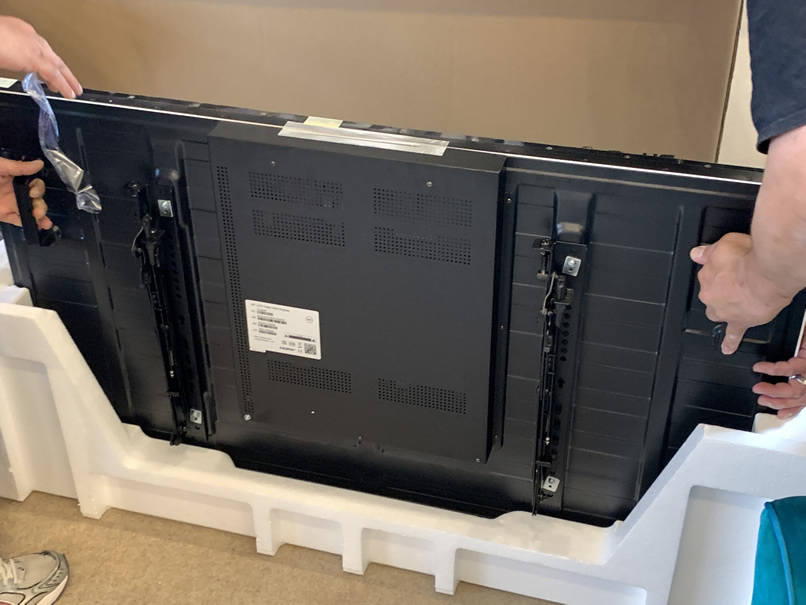
Step 3: Physical Installation of Screens
The physical installation stage transforms planning into reality. Professional installers ensure that screens are mounted securely, powered correctly, and integrated neatly into your environment.
Key considerations during installation include:
- Safe mounting: Screens must be securely fastened to walls, ceilings, or stands using approved fixtures. Safety is a top priority.
- Cable management: Cables are routed neatly and safely, preventing tripping hazards and preserving aesthetics.
- Ventilation and heat management: Digital signage screens generate heat. Adequate airflow prevents overheating and extends lifespan.
- Screen alignment: Multiple screens used in video walls or multi-screen networks need precise alignment for a seamless effect.
- Testing and adjustments: Once in place, screens are tested for brightness, colour balance, and connectivity.
A professional setup not only looks smart but also ensures your digital signage operates flawlessly.
Step 4: Software Setup and Configuration
While physical installation is vital, the digital aspect of digital signage setup is just as important. Software allows you to schedule content, display live feeds, and update screens remotely.
Typical software setup involves:
- Configuring media players to connect with the signage management system.
- Scheduling content so screens display the right message at the right time.
- Integrating data sources such as news, weather, or internal systems.
- Setting permissions for different users across your organisation.
With the right software in place, your signage becomes a powerful tool for real-time communication.
Step 5: Ongoing Support and Maintenance
Digital signage setup doesn’t end when the screens are switched on. Ongoing support ensures everything continues to run smoothly. This includes:
- Remote monitoring of screen health.
- Regular software updates.
- Prompt repairs in case of hardware issues.
- Advice on evolving your signage strategy as your needs change.
Working with a professional provider means peace of mind, knowing your signage will continue to deliver value long after installation.
Why Choose Sabercom for Your Digital Signage Setup?
At Sabercom, we specialise in delivering complete digital signage solutions to organisations across the UK. Whether you’re installing a single display in reception or rolling out a multi-site network, our team provides expert support every step of the way.
Here’s how we help:
- Comprehensive site surveys to design the perfect solution for your space.
- Supply and installation of hardware including commercial-grade screens, mounts, and media players.
- Professional installation by experienced engineers, ensuring safety and reliability.
- User-friendly software that makes scheduling and managing content simple.
- Ongoing support and maintenance so you get the most out of your investment.
By choosing Sabercom, you avoid the pitfalls of DIY installations and guarantee a digital signage system that performs exactly as you need it to.
Final Thoughts
A successful digital signage setup requires more than just plugging in a screen. From site surveys and hardware selection to installation and software configuration, every step matters. Done correctly, it ensures your signage is safe, reliable, and effective.
If you’re planning to install digital signage in your organisation, don’t leave it to chance. Partner with experts who understand both the physical and digital sides of the setup process.
Ready to transform your communications with professional digital signage setup?
👉 Contact Sabercom today for a free consultation and discover how we can design, install, and support a solution tailored to your business needs.
